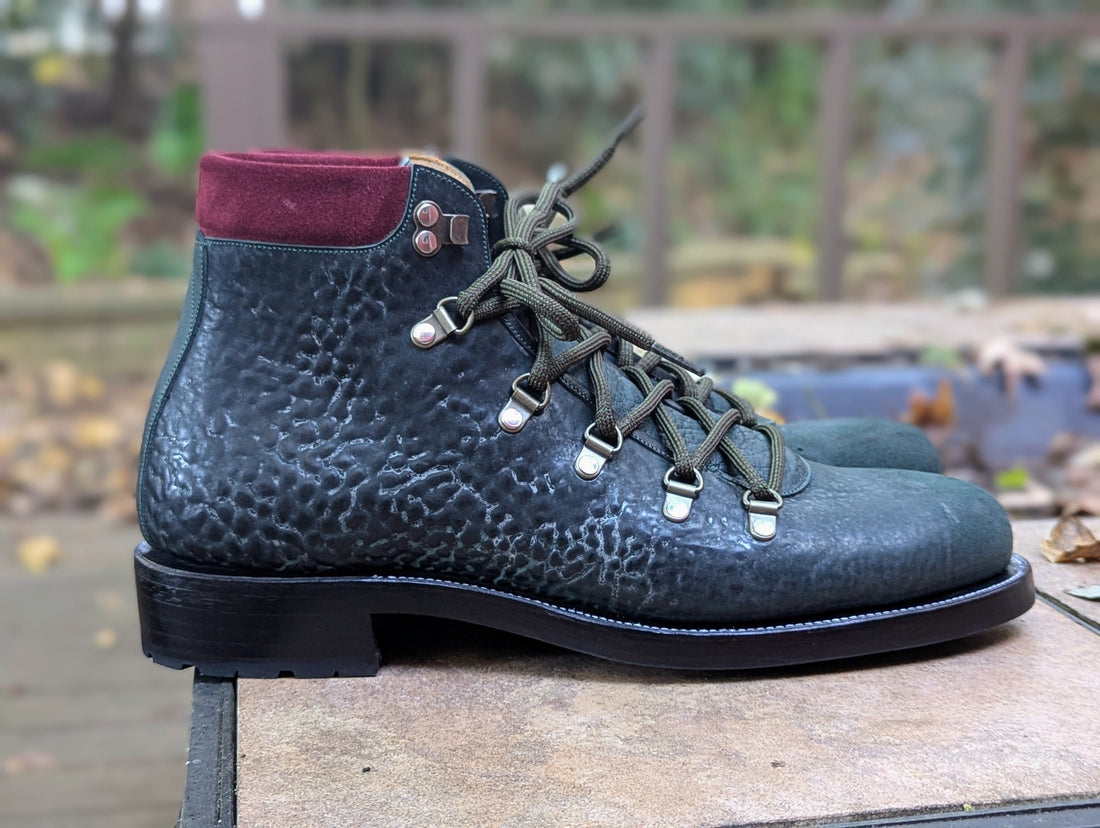
I’ve had a general shoemaking goal for a while now, to make one pair in every style. This is documenting my attempt at a hiking boot. This whole thing came about because I saw some cool looking hiking boot laces and decided to buy them, naturally I had to make a pair of boots to go with them.
This pattern is based off the method I used for the wholecut pattern. This guide assumes you know how to create a pattern base (I go over that in previous posts in this series).
Tape off your last like usual, and draw out a general look on your last. Afterwards transfer your tape to a piece of paper and extend the tops of the boots, etc. Once you have a pattern base, you can go about creating the actual pattern pieces.

Here is an example of my pattern base. Very simple, a back strip to hide the back seam, and a padded collar. For the facing, I did about 1.5 cm in from the center line of the last, giving me a fairly wide space for the tongue. That line initially just follows the curve of the center line of the last, then gently merges into the vertical portion of the shaft. I don’t have a specific technique to do it, mostly just eyeball lines that look right. I determine the width of the tops by measuring ankle circumference then subtracting about what you want your facing opening to be (here its 3 cm), keep in mind tongue will add volume so you can extend the width of the tops out a little more.
One thing to note here, the facing on hiking boots extends quite a bit farther down than normal derby boots. You can vaguely see where I marked my ball girth line on the pattern base (the widest part of the last), I extended my facing 3.5 cm down past it.
I wasn’t sure how to space the eyelets initially, so I marked some holes about 1.5 cm from the facing, and about 3.3 cm between them. On the actual pattern, I extended them 1 cm out from the initial marking, perpendicular to the facing. My rivet holes ended up being 2.5 cm out from the facing and about 4 cm between them.
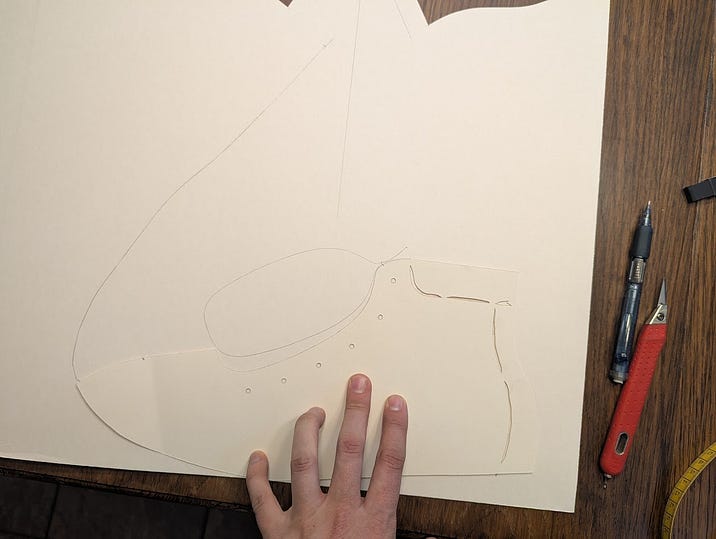
Draw a center line like usual on a piece of pattern paper, then place your pattern base with the highest point on your toe (Point A, marked in green here) and the top of your facing along the center line. It is a good idea to mark that point on your toe, both on the center line and on your pattern base, you will use it as a reference point later.
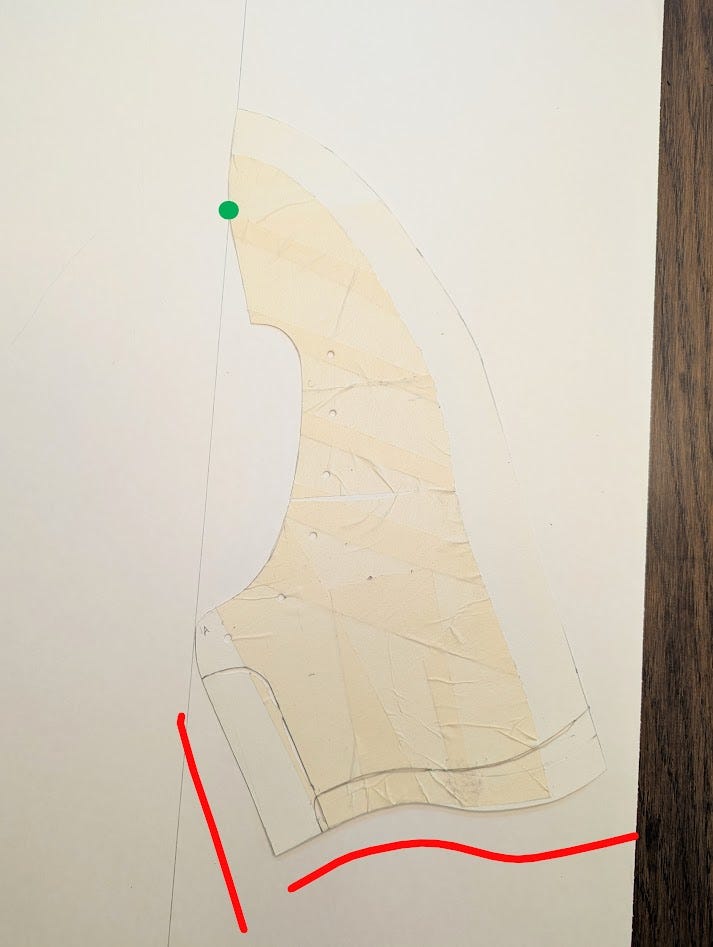
Trace out the lines pictured in red.

Next, line up point A and point B (where the facing meets the center line on the last, marked in Blue) with the center line, and draw out the line pictured in red. Make sure to mark point B as well on your center line.


This part is a little hand-wavy. I lined up point B and angled the pattern base a bit, about 1 cm or so, then drew out the red line. You can add a bit extra to the lasting allowance later if you are worried about not giving yourself enough space with this maneuver.

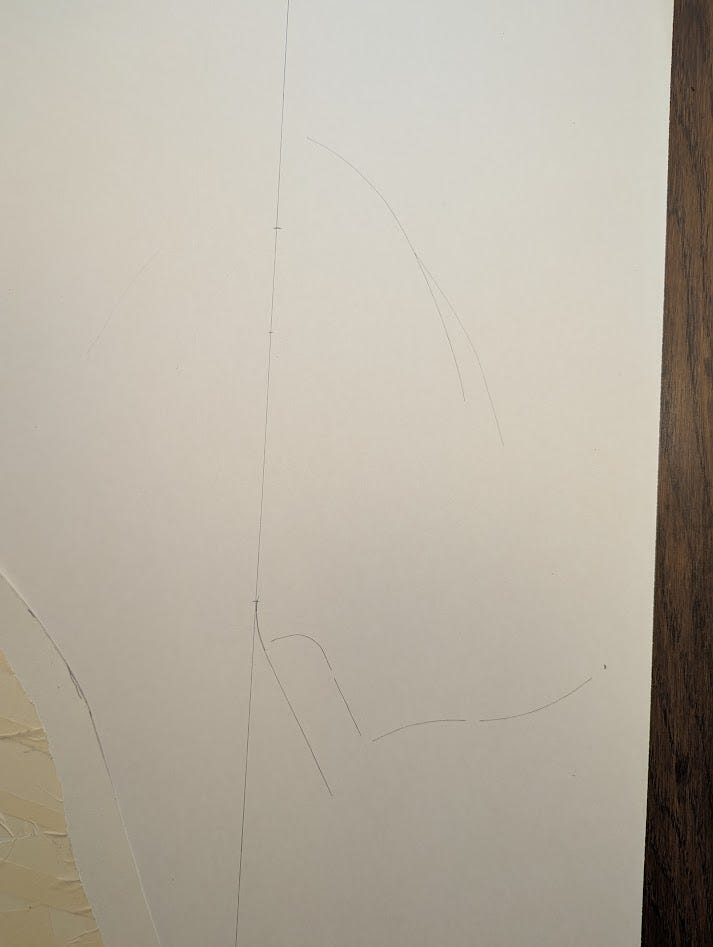
Finally, draw out your last line between the middle portion you just drew and your heel line you drew first (marked in red).

From here you can draw out your facing, lining up point B and the top of your quarters with the center line.


Do all that on the other side now. Make sure to mark your eyelet points.

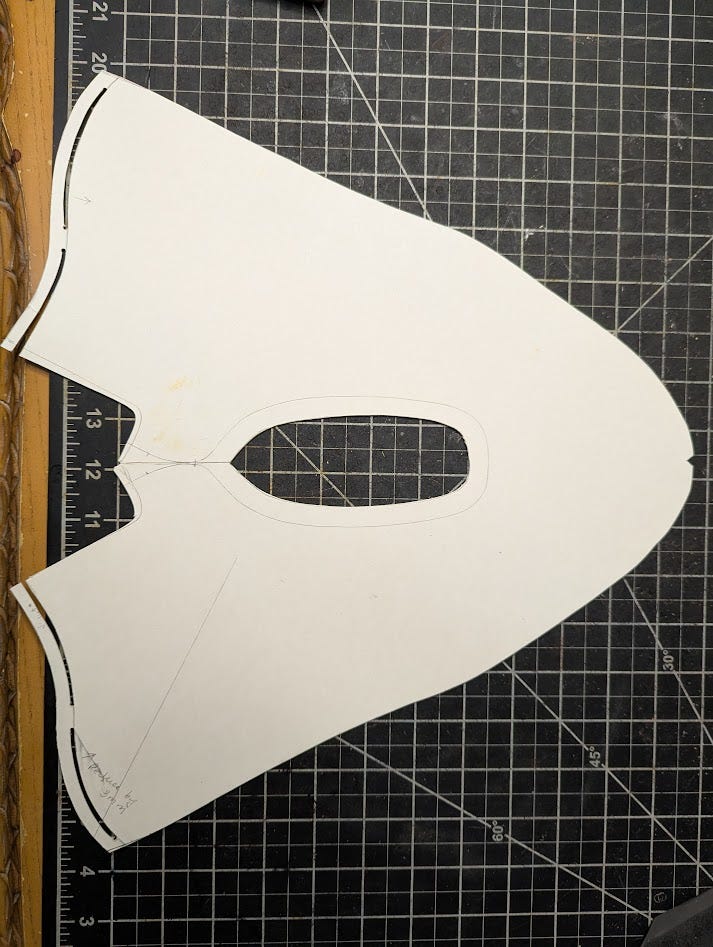
Fix whatever lines you need to at this point. In my case with how the pattern was shifted around I had a little point on the facing that I smoothed out.
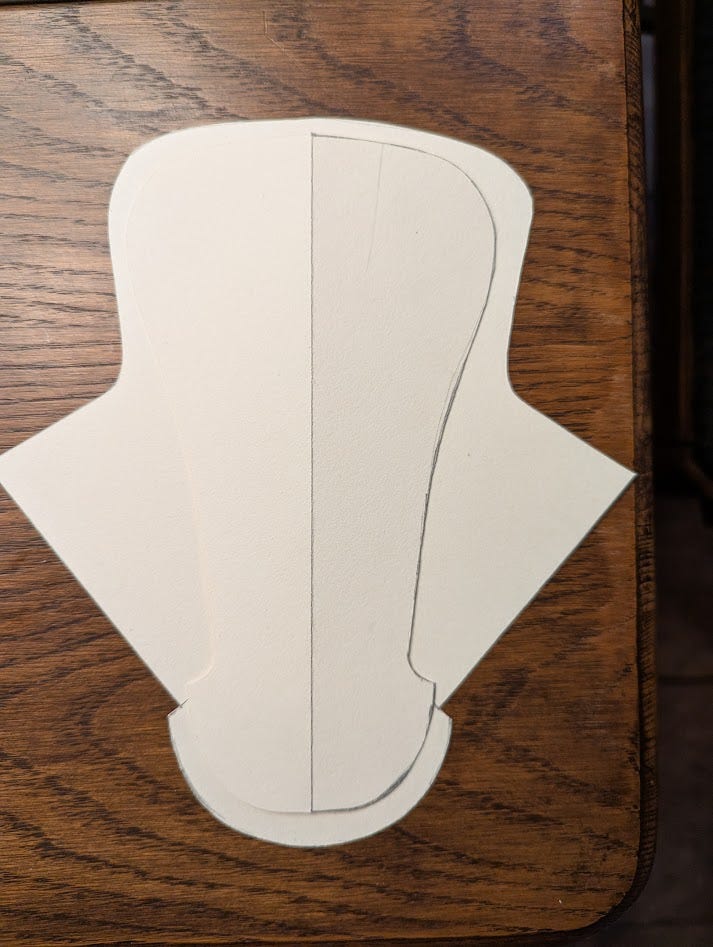
Go ahead and cut out your vamp pattern at this point, you will use it to create your lining pattern. I traced the vamps out, then lined up the pattern base on it to draw out the different heel line, since my vamps have a back strip but the lining doesn’t. I also extended the top to give it some allowance for stitching.

Make sure you add a small allowance along the top line of your lining, so it is easier to stitch. I added about 1 cm, I should have added more at the facing because I almost didn't have enough with how I had to shift things around so I wouldn't have any puckering on the lining along the top line.
The tongue was a bit tricky and a lot of trial and error. I haven’t handled any hiker boots personally, but there seem to be a lot of different styles of tongue, all of which are stitched along the top line.
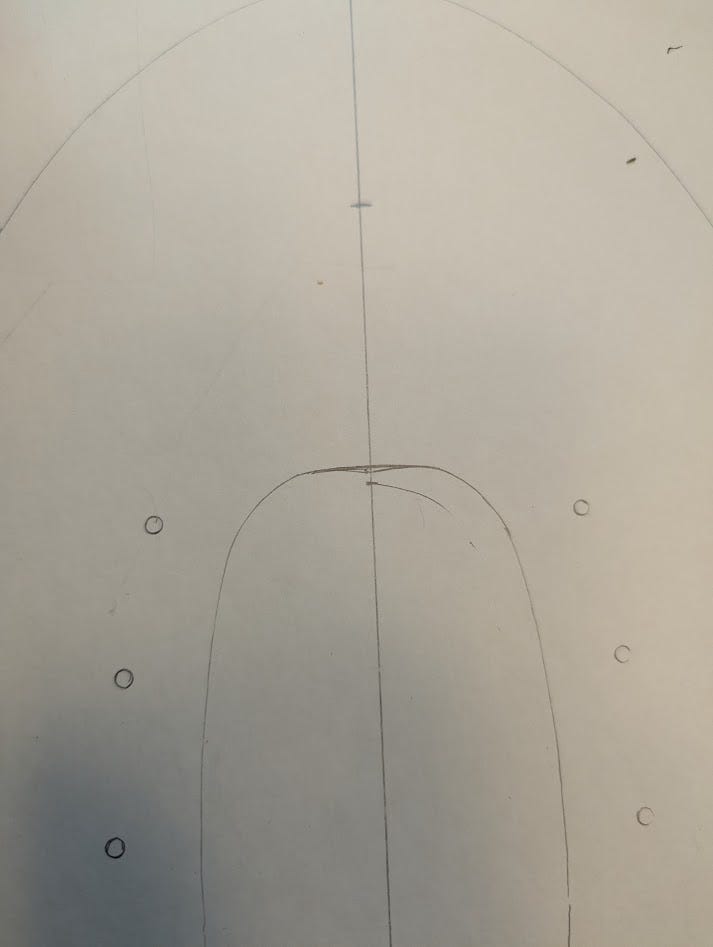
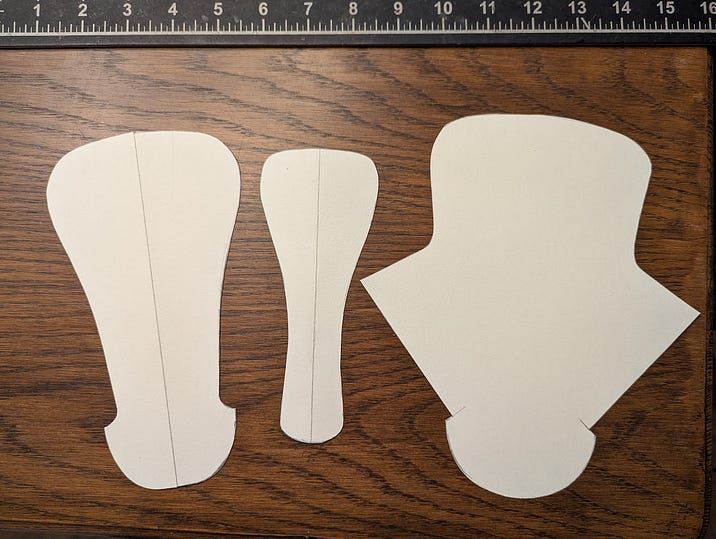
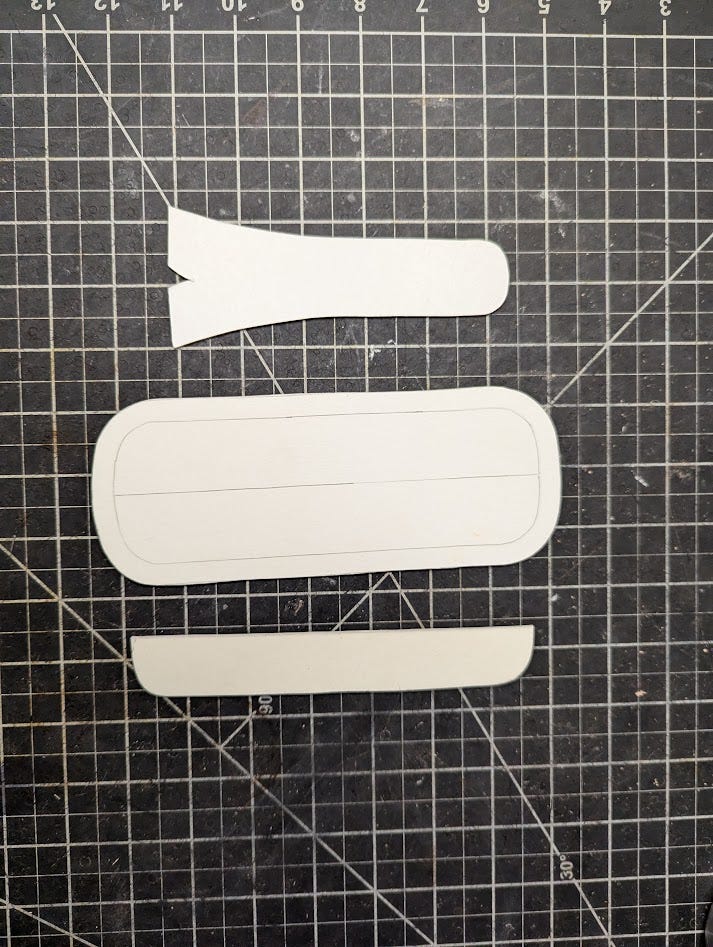
Pieces from left to right, tongue, padding, lining. I didn’t take any pictures of the process, but I made the tongue so that it will overlap around the bottom of the facing, then narrowing down and flaring out on the top. For a ~6 cm facing opening, the width of the base of the tongue is 7 cm, 5.5 at the point where it narrows, then flares out to 10.5 at the top. The lining pattern is just all around wider than the tongue (so that it can be stitched properly), and in the area where it widens out, its 18.5 cm.
And this is how it stacks up. There is a slit in the lining, at that point is where the tongue transitions to the lining along the top line. Notice how they don’t quite line up, that made stitching tricky, if I was to do this pattern all over again I would widen that transition point on the tongue a bit so it lines up better with the lining.
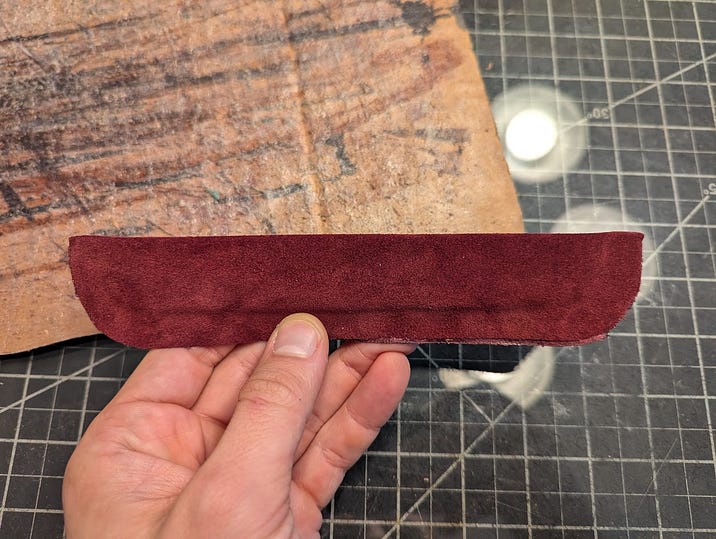
Here are the remaining pattern pieces. Top is the heel strip, middle is the padded collar, bottom is the padding for the collar. I just flipped the collar from my pattern base along a center line and added a lasting allowance.
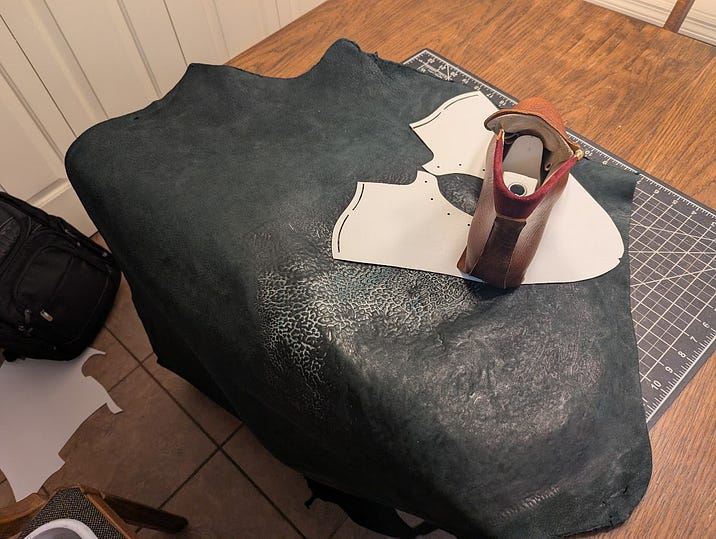
Getting ready to cut. I ended up making a mock up boot to test the pattern first.
Making the collars, I had some dense foam material that I used for the padding. It seemed to work quite well.

Tongue stack up.

And here it is glued to the lining. I used rubber cement, and left the bottom portion loose. You can stitch the tongue to the lining at this point, leaving the short transition and the bottom portion un stitched.

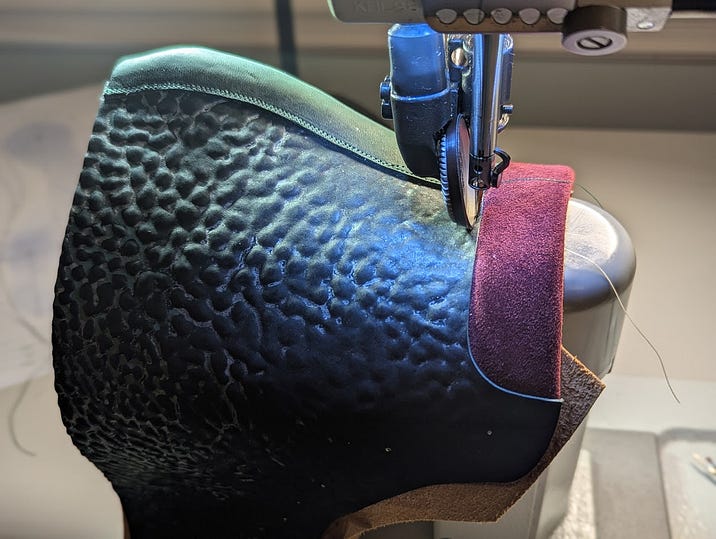
The assembly is quite simple. I stitched the back strap to the vamps first, then glued in the collar. Line up the lining with the vamps with a bit of rubber cement, then stitch the top line in one continuous stitch.
All stitched, at this point you can trim your lining.
Next glue your tongue in, sandwiching the vamps between the upper and lining of the tongue. Overlap it enough so your roller foot doesn’t fall off the edge of your vamps when you stitch. Stitch the blue line all the way around the tongue first, leaving a bit loose on both sides for the transition to the lining (where I marked in red, but both sides). Also notice the odd transition between the tongue and lining, I mentioned it earlier, I would extend that line a bit so everything lines up better in the future.

Once you have the base of the tongue attached, glue in the lining making sure the upper of the tongue overlaps it a bit at the transition point. Finish the stitch to the top. Do one side at a time.

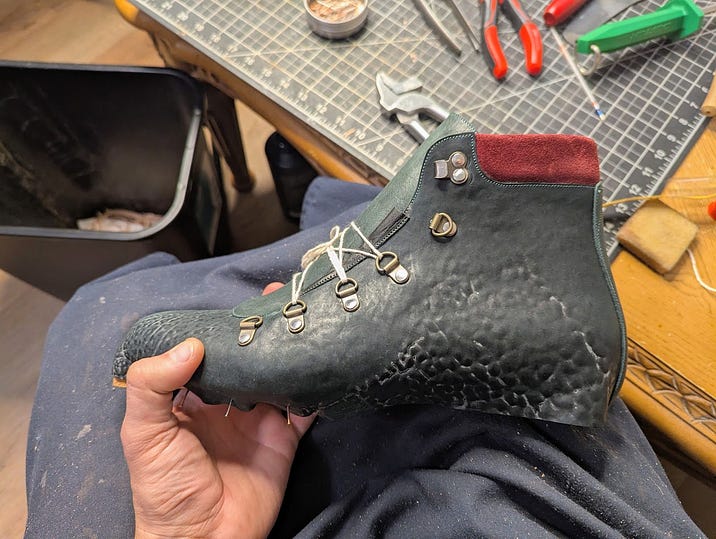
Next you can install your eyelets. I used 3/8" speed laces and a 1/4" speed hooks from Weaver Leather Supply. You set them with 1/4" double cap rivets (and a cheap rivet setter). I punched 2mm holes for the rivets.
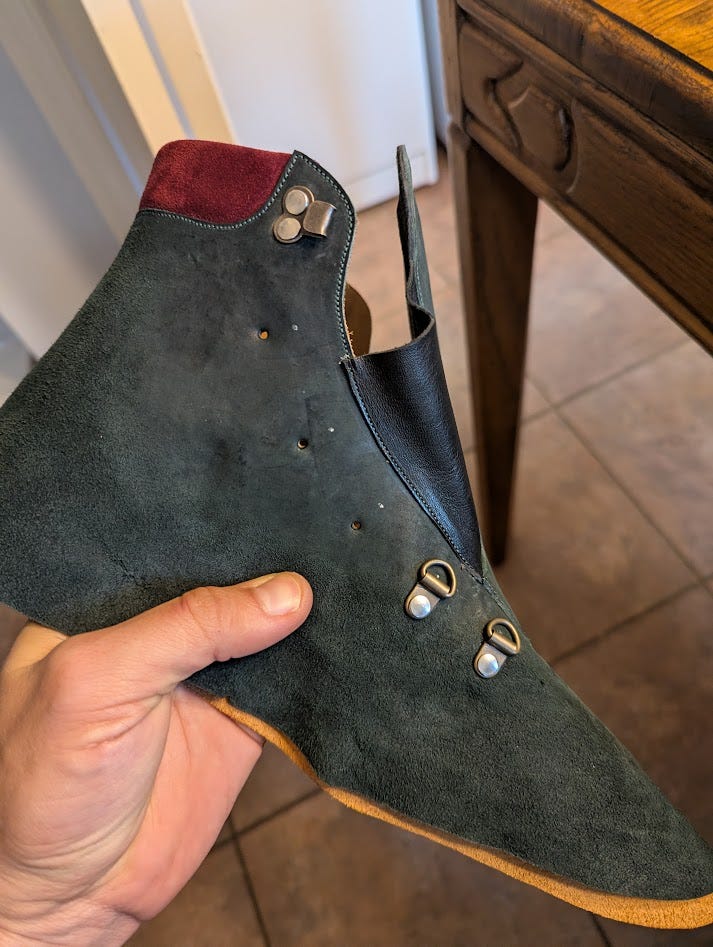
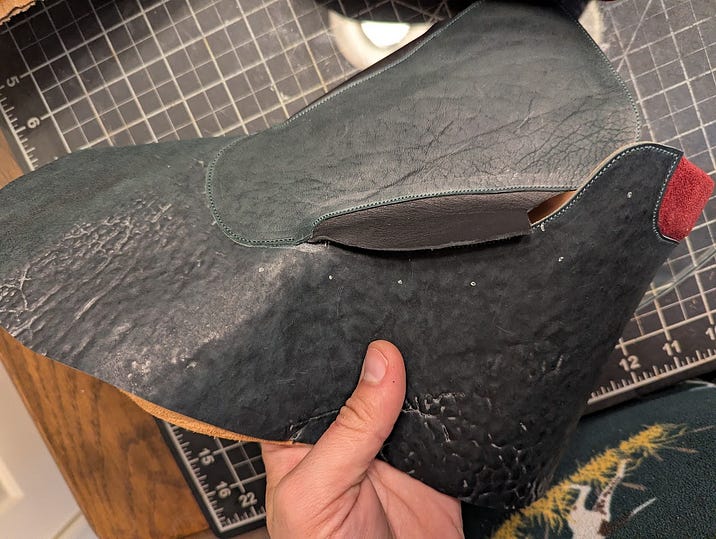
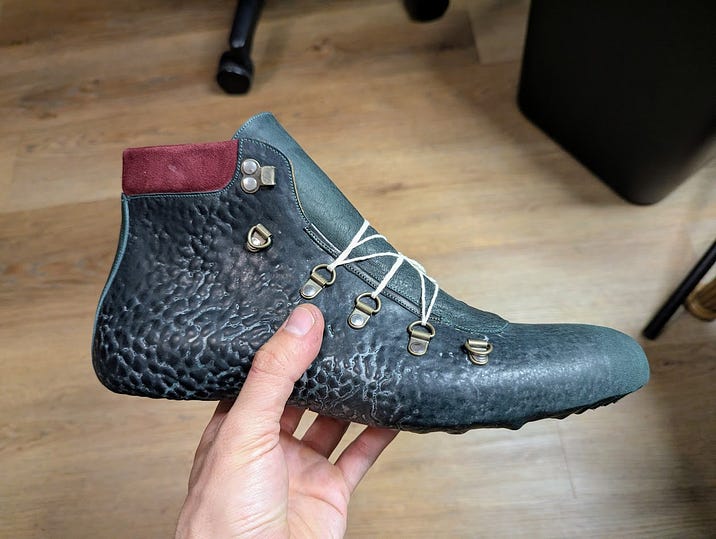
Finished uppers, doesn’t look like much…

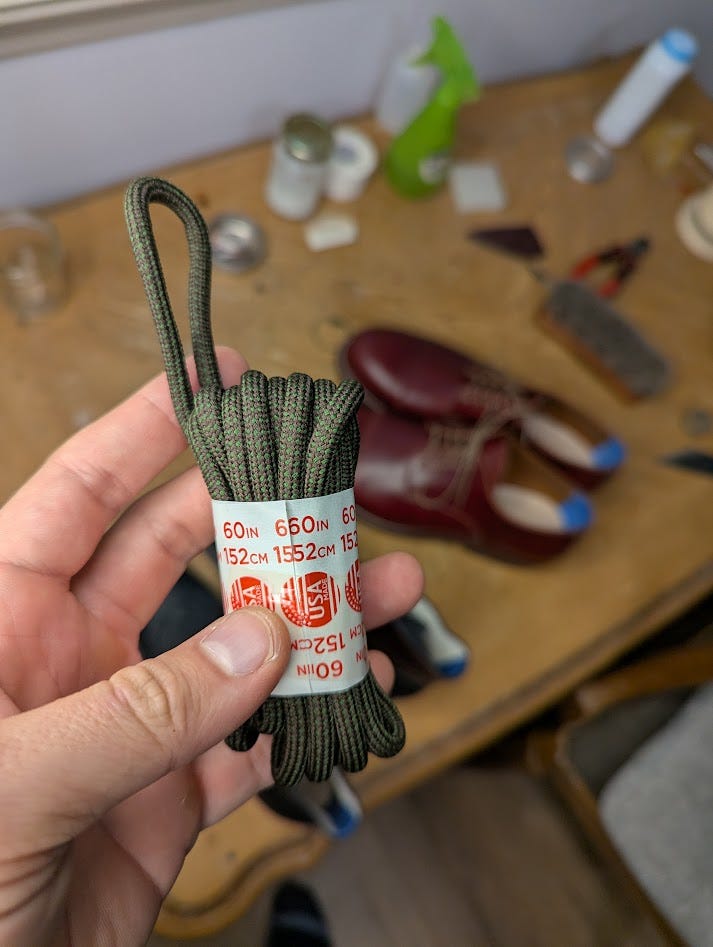
And some hiking boot laces from Shoelaces Express. They are quite nice and reasonably priced.
Pre-lasting was a very important step for these uppers. The pattern doesn’t have any inherent contouring so the uppers didn’t want to lay in place initially. I pre-lasted as well as I could (there was a lot of pulling in the waist) and let them sit on the last for a while. When I went to do the real lasting it was super easy since the uppers already took on the shape.
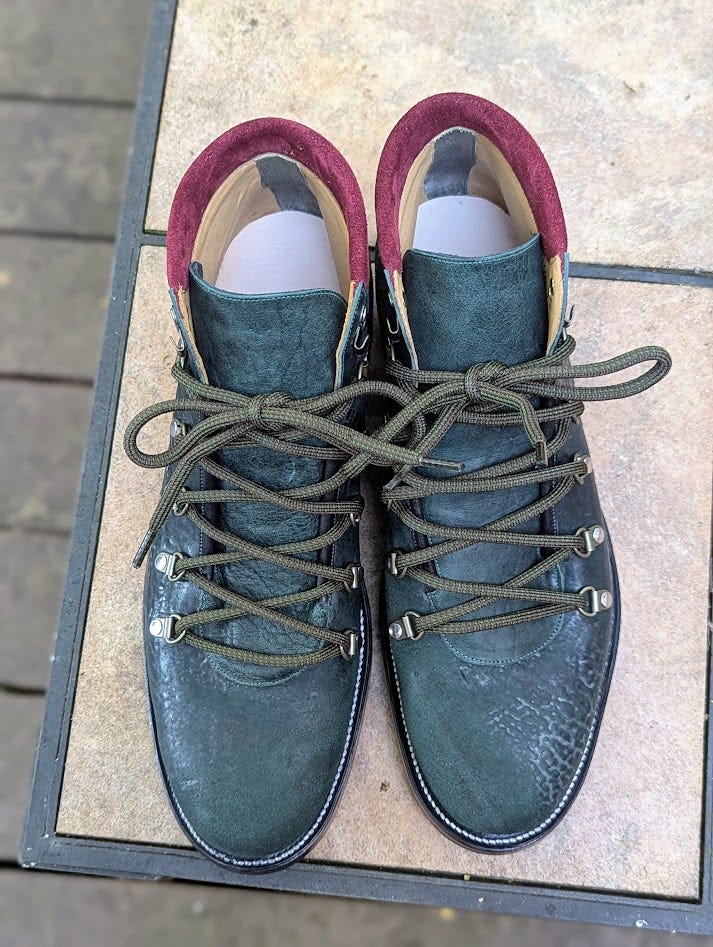
I wasn’t sure what to think of this pattern initially. The side profile looked okay, but the top down looked weirdly proportioned.

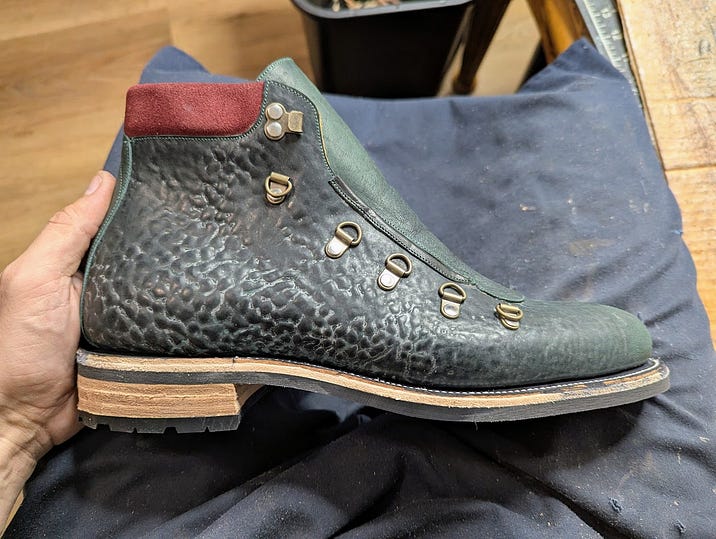
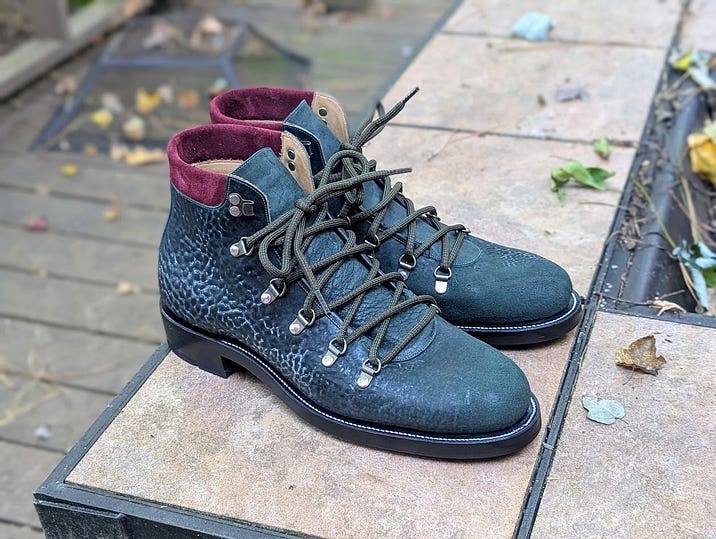
Once the sole was attached, all the everything came together.
And here you go! Damn… They turned out way better than I expected.
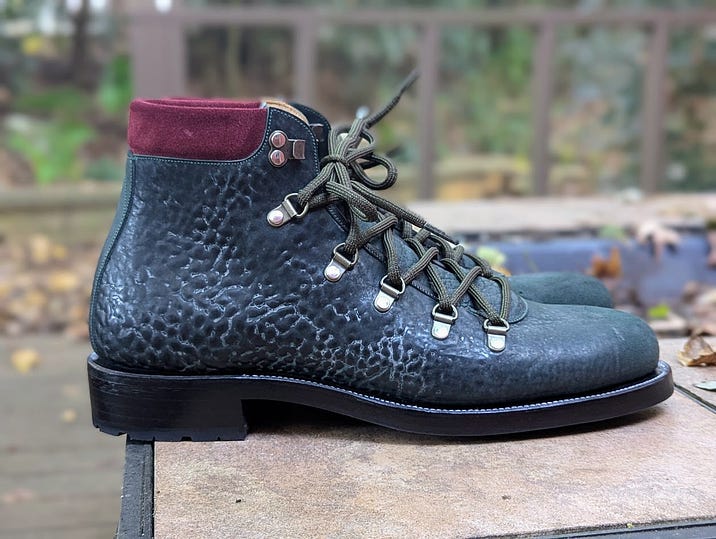
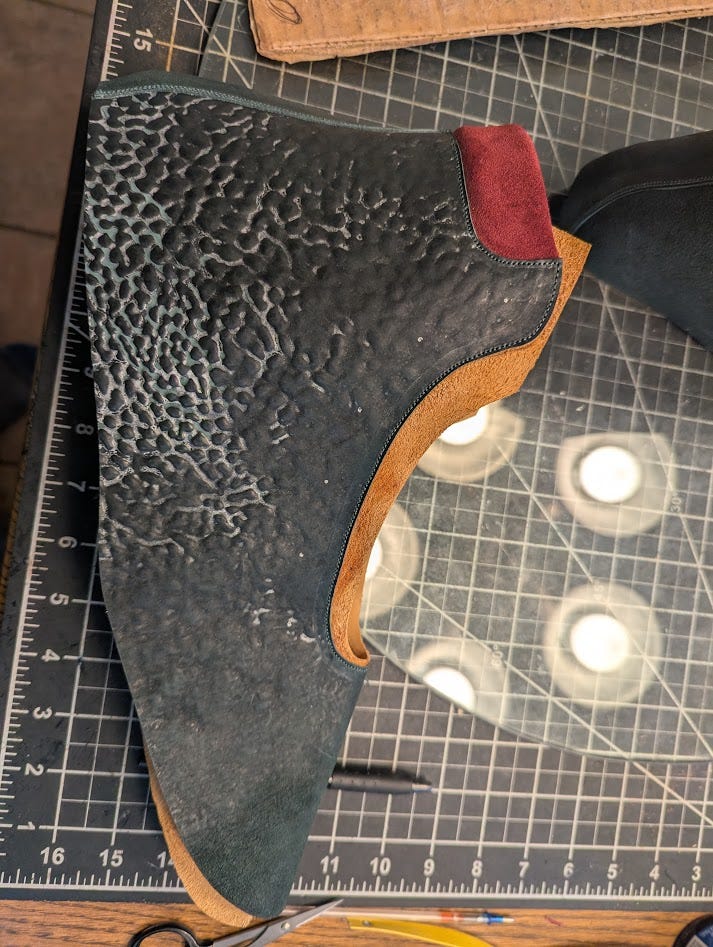
The inner side is completely different, just the roughout part of the hide. This is Dark Green Culatta Rude from Conceria Cloe, basically tumbled and shrunken horsebutt. The gnarly texture is the shell cordovan layer. The shell and the leather shrunk at different rates which is what gives you the gnarly texture.


To keep up with my current projects, give my Instagram page a follow