One of my shoe making goals has been to make every style of shoe and boot. Once you know the basics on how to make a derby, oxford, and boot, you can extrapolate from there and figure out the rest. There was a whole lot of trial and error here, hopefully you can learn from my mistakes and it goes easier for you!
I am skipping some of the basic info on how to actually draw out the pattern base. If you’re not familiar with the process, check out the other guides. If you have read the boot pattern guide, in essence we are doing the same thing as making the zipper boot here. Once you tape off your last and draw out the basic lines, transfer the tape to a piece of paper (without springing it) and draw out the rest of the boot. You use the same concepts in the original boot pattern guide to draw out the lines for the top of the boot. I unfortunately didn’t take any pics of the process but it should be pretty straightforward if you’ve done a few of the more basic boot patterns.
Note: Use hinged lasts at your own risk! Slip cone or three piece lasts work best for boots with a tall top. I found this out by almost completely tearing my boots up trying to pull the last out. The back of the heel stretched so much to accommodate the last, I thought it would blow out!
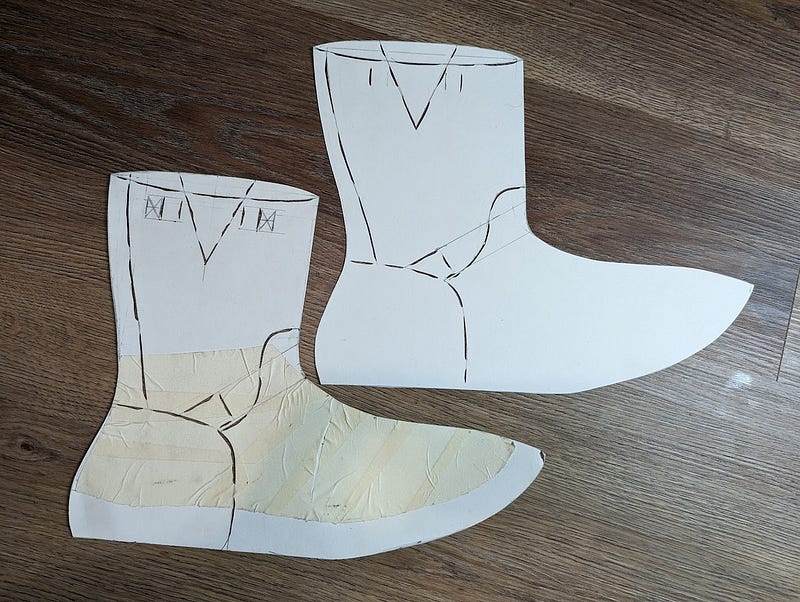
You can see how I did mine. A few things to note. The heel counter(s) are essential. This is going to be an unlined boot shaft, so you need something to cover up your back seam. You also need that “V” to make the top have a little bit of give to make it easier to put the boot on, then cinch it back in so its not loose.
I intend for my boots to have an asymmetrical topline, that’s why you see the circle looking lines along the top. The outside is going to be higher than the inside.
Make sure you measure out your strap lengths really well while it is still on the last! Then give yourself some more length just in case, you can always trim if it’s too long. I didn’t do this, so I had to redo my straps twice.
Finally, make sure you give yourself a good amount of space in the pass line (the area where the top of your foot and heel have to get in to the boot), if it is too narrow you will not be able to get your foot into the boots.
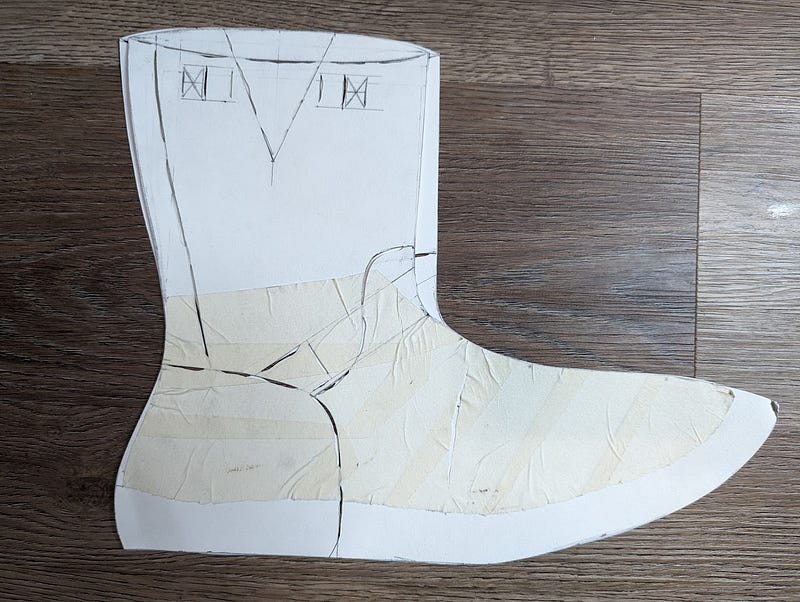
You can see here how I initially made the patterns versus how I had to come back in and fix it. The pass line should be at a minimum your heel measurement + 7mm buffer give or take. Heel measurement is the base of your heel to the top of your instep. If it is too tight it will be incredibly difficult to get the boots on. If it’s a bit loose, you’ll have some heel slip, but you can always use the strap to cinch it down.
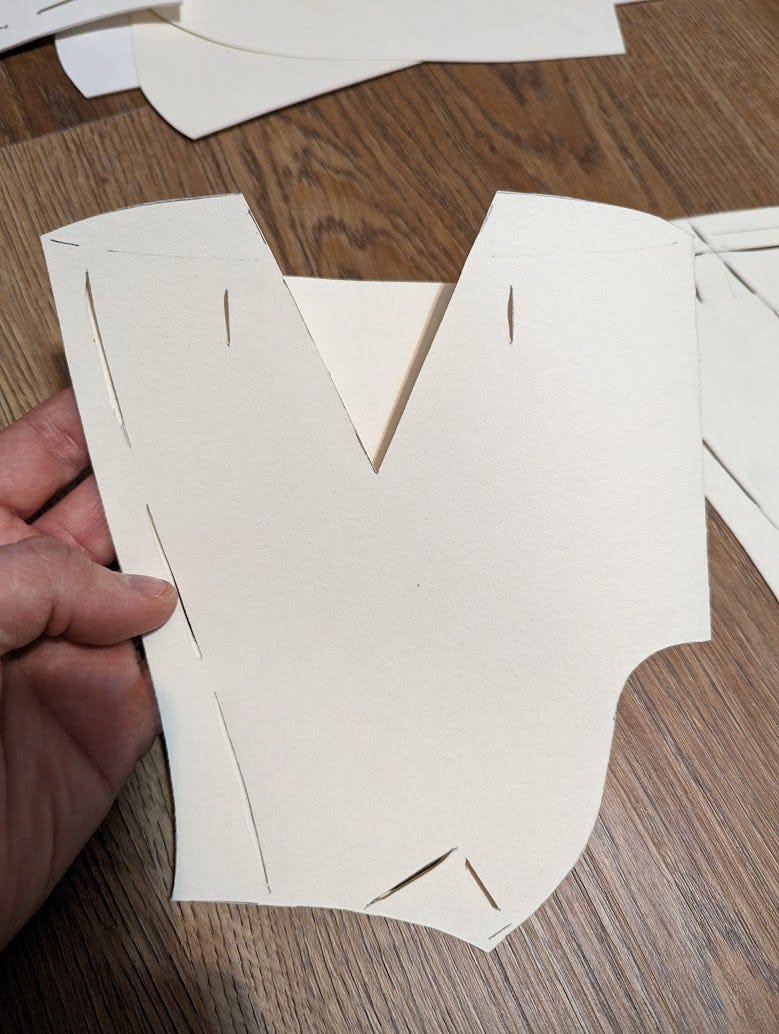
The trick to making the top pattern is to take a piece of paper, fold it down the center, then draw out half of your top pattern from the pattern base. Cut it out, open it, and you have a full pattern. You can use that to transfer it to more durable pattern paper. You also have a center line along the crease so if it’s asymmetrical like mine you can fix whatever lines you need.
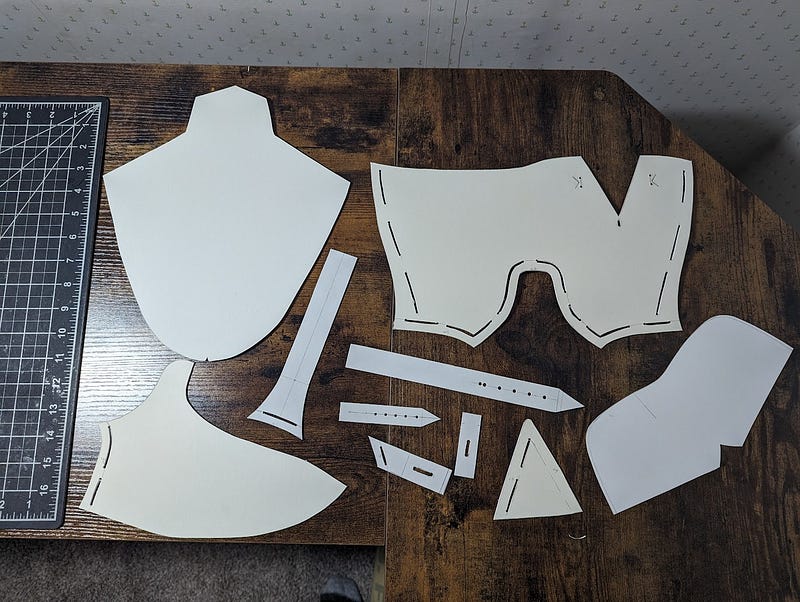
Here is a pic of all of the pattern pieces spread out. Same method as the other boot pattern guide on how to create all of these pieces from your pattern base (and adding all the seam allowances, etc). I created a silhouette for the vamps because they are going to be crimped. I don’t really have any good advice on how to create the pre-crimped pattern, I ripped it off of a cowboy boot pattern. You can basically mirror your vamp pattern along a center line while pivoting it at the tongue area, then give yourself plenty of buffer for all the plier marks and nail holes from crimping.
Notice how my tops don’t extend all the way down to cover the heel. That is because I am going to have some lining in the heel area (just the same pattern piece as the upper heel counter). Using the same exact pattern base, you can extend the tops down to cover the heel, then just cover that part with your heel counter so that you have some space to sandwich in your heel stiffener.
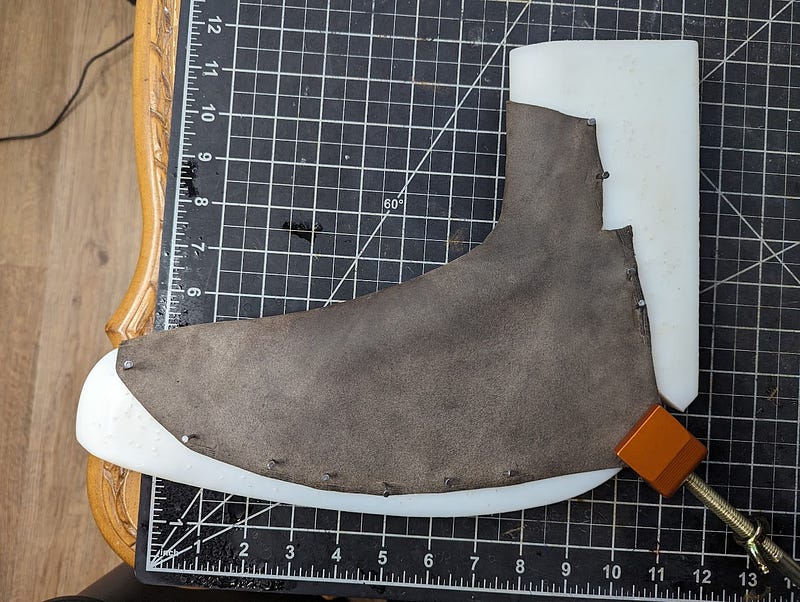
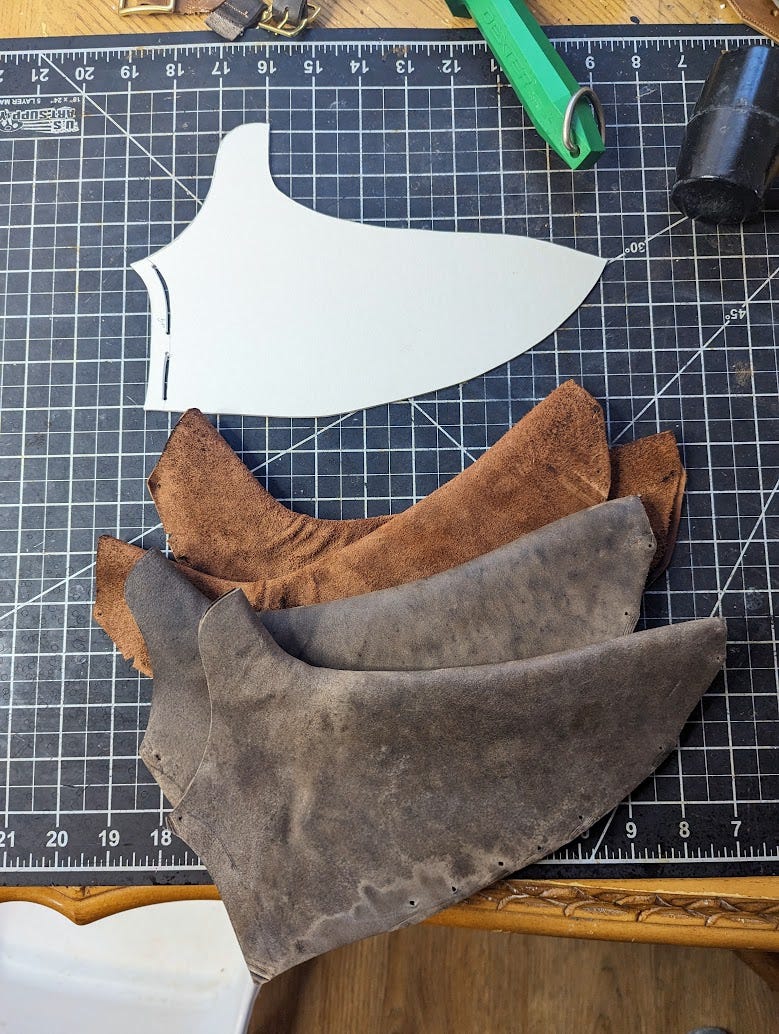
Vamps and lining crimped then cut out. I soak the leather for about 20 minutes before crimping, it makes things easier to stretch into shape. Make sure to hit it with some conditioner after because the water really dries out the leather. Notice how I didn’t trim the tongue part of the lining. I left extra so it will be easier to get the stitching to also catch the lining, you can trim the excess later.
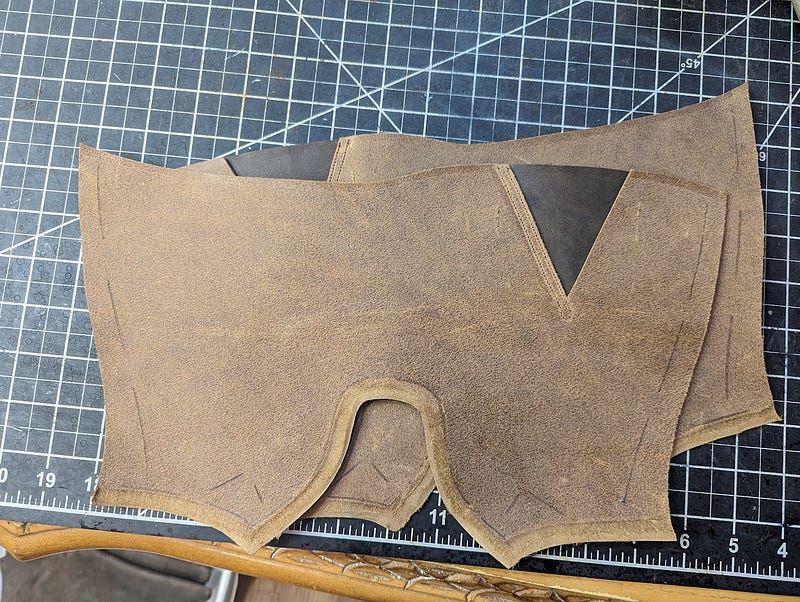
Tops cut out and the “V” sewn in. The order of assembly is important.
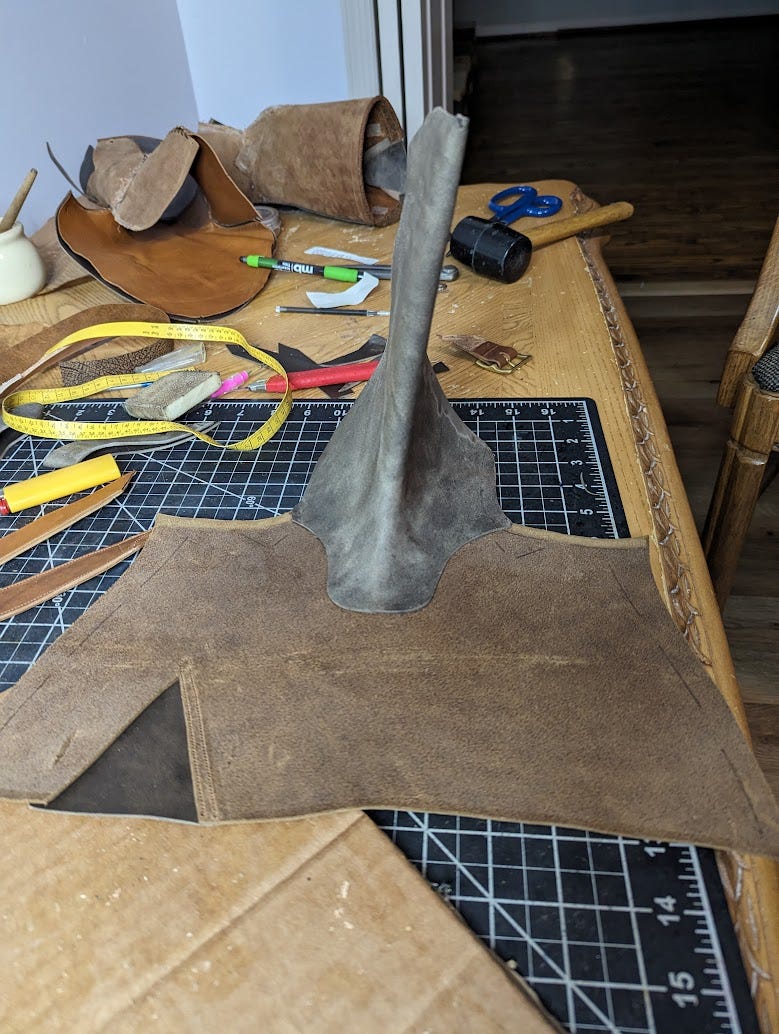
Vamps glued into place. I used contact cement instead of rubber cement, you don’t want it slipping around while sewing. Once you get the vamps in, put the lining in as well, sandwiching the seam allowance of the tops.
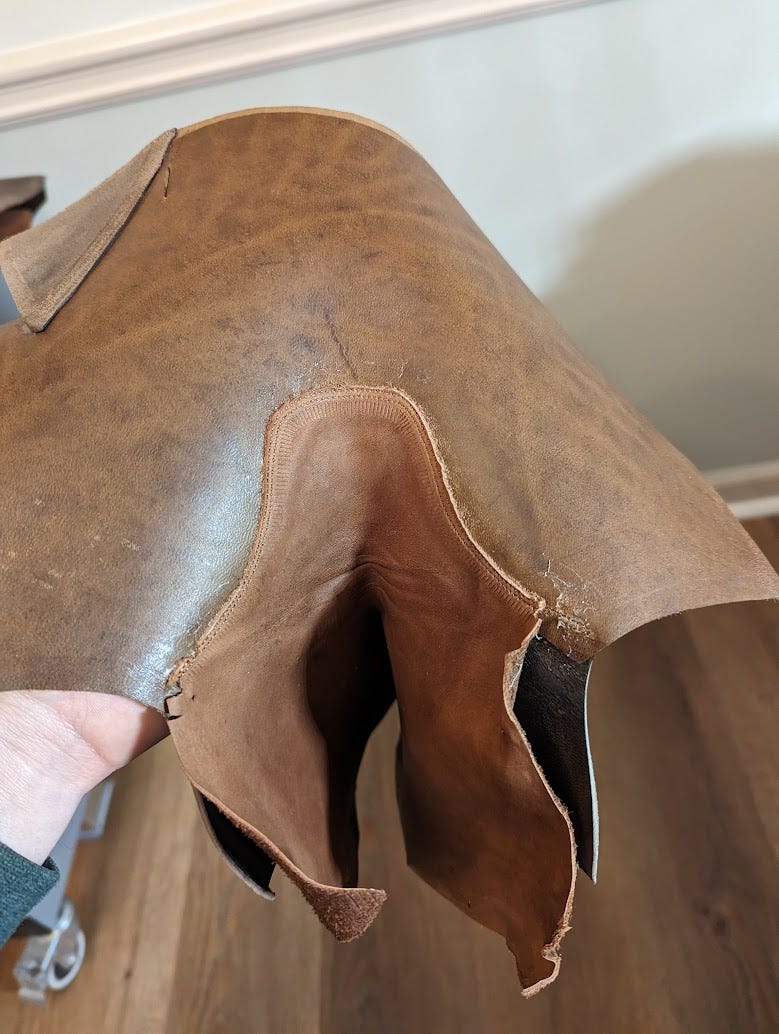
Once you stitch the vamps on, you can come back in and trim the excess of the lining.
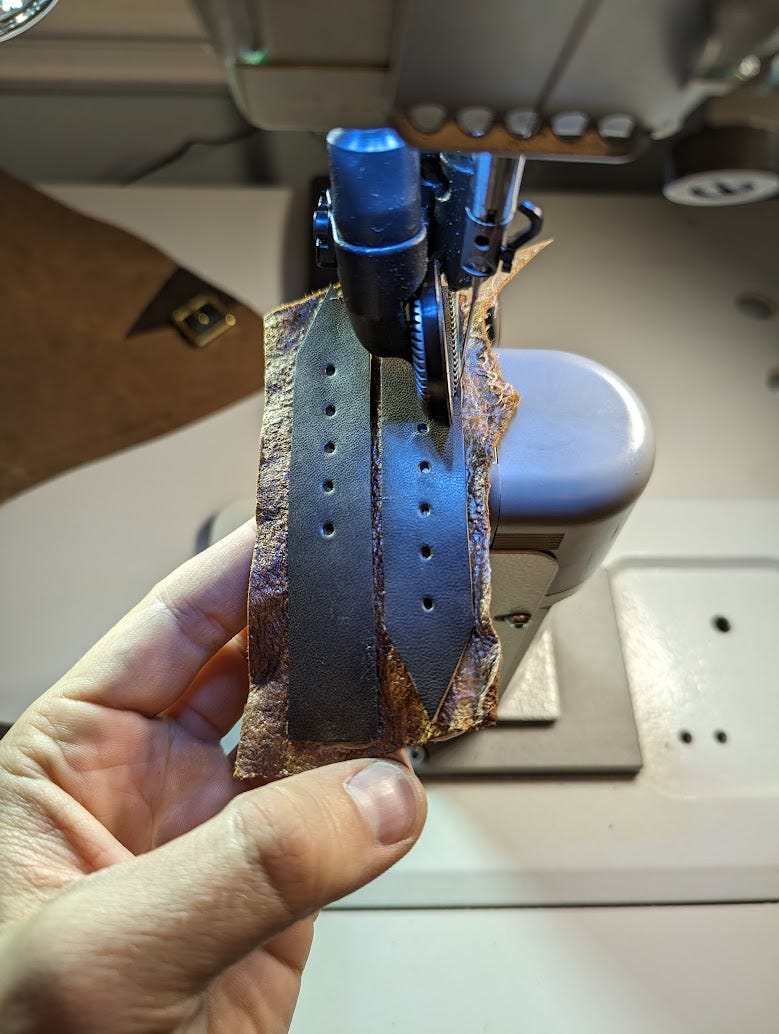
I lined all of my straps to give them more strength. The horsehide I am using for the uppers is a bit stretchy so I didn’t want the straps to warp.
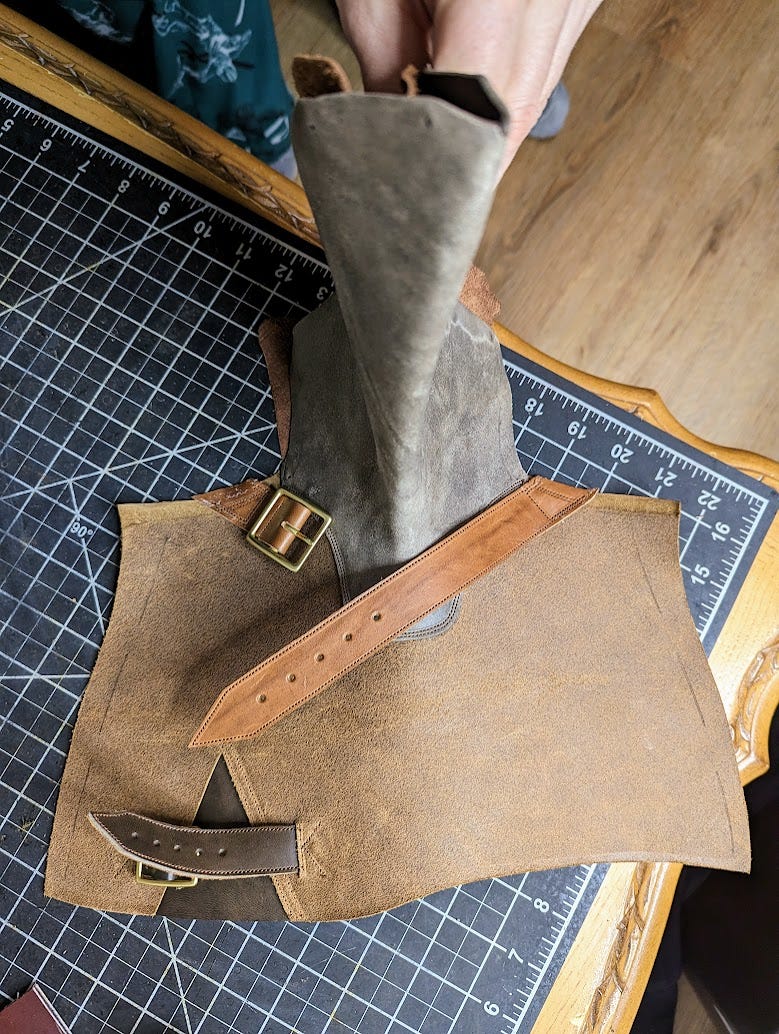
Attach all of your straps. Make sure you skive the instep strap pretty well where it will be under the seam allowance. I didn’t do such a great job here so when I went to stitch the heel counter on, the difference in heights of the leather made my stitches a bit wonky. Notice how I stitched across the straps. After I did that I realized that it would weaken them considerably, since you’re kind of perforating leather there. I added some hand stitched stay stitches afterwards which will take most of the pressure when you cinch down the straps.
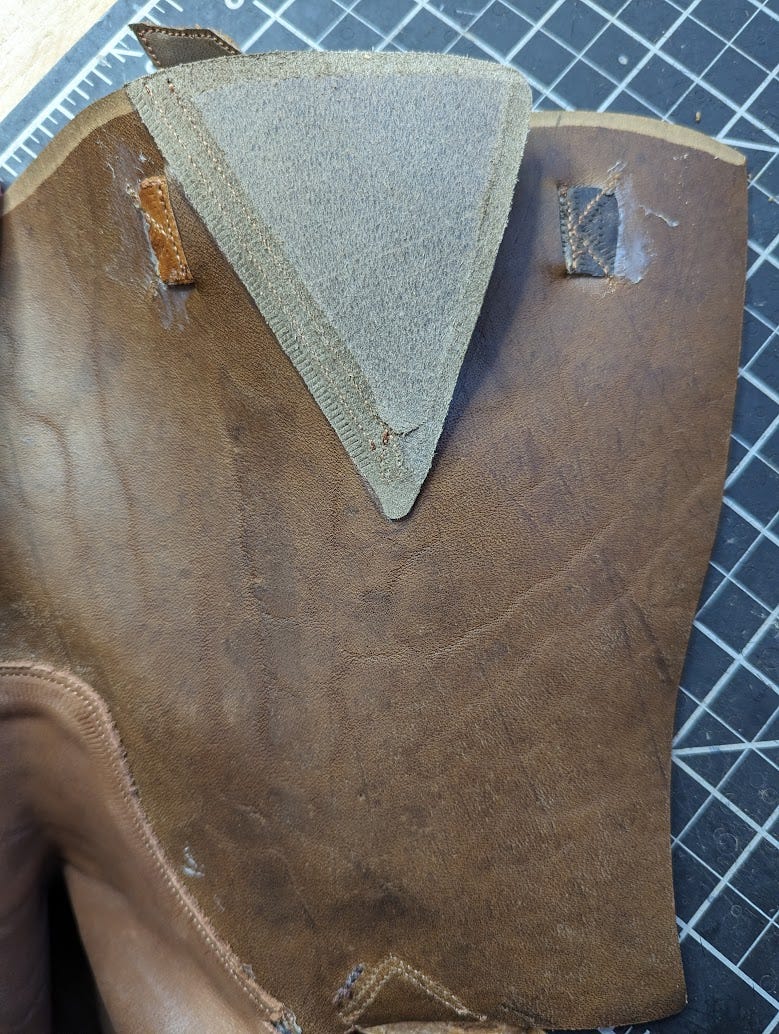
Figure out some sort of decorative stitching for your straps as well, you don’t want the edges coming up if the glue ever gives out.
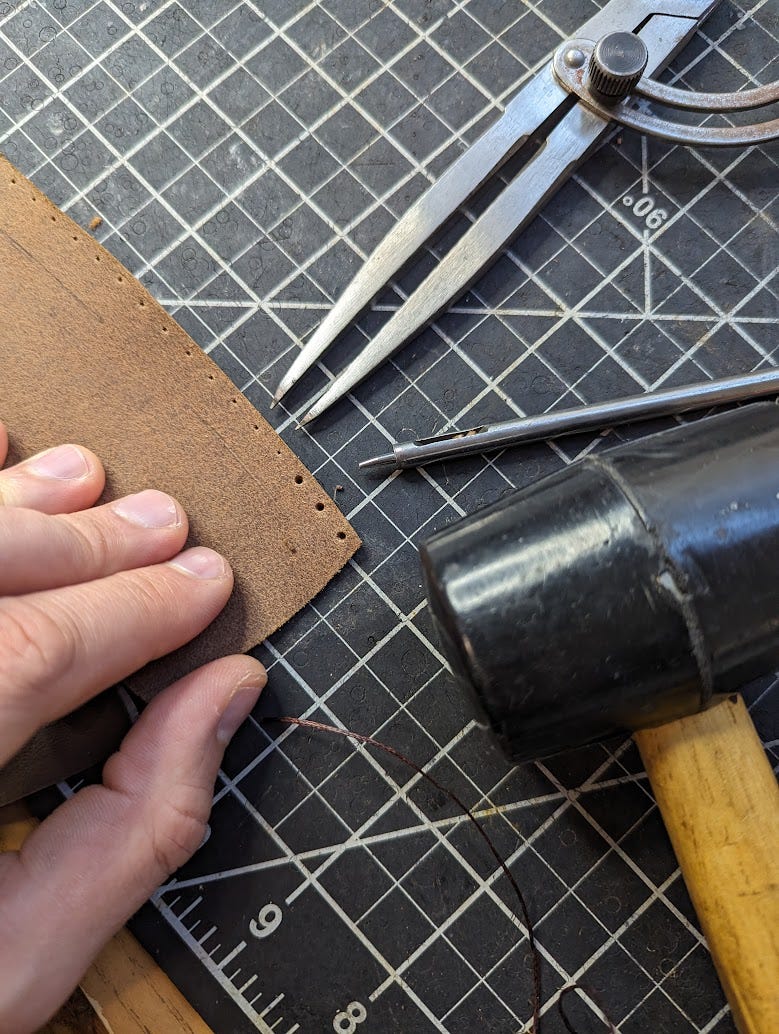
I marked out my stitch holes for the back of the tops with a compass, then punched out all the holes.
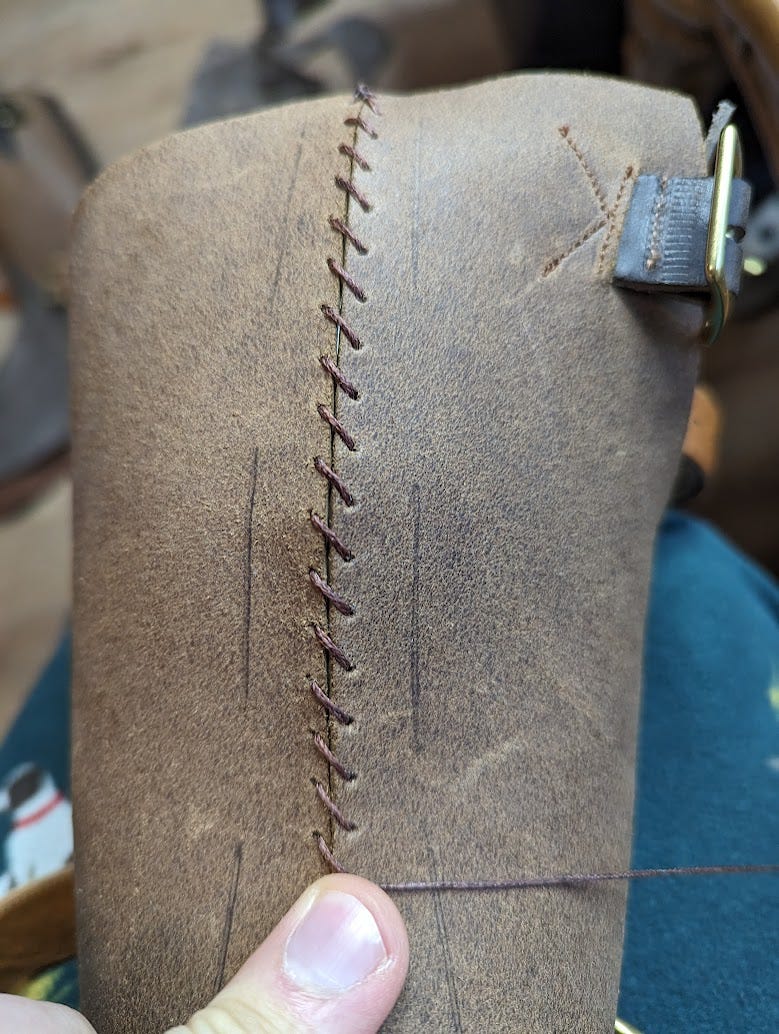
Not sure what this stitch is called, whip stitch maybe? Anyway, important to keep both panels even while stitching.
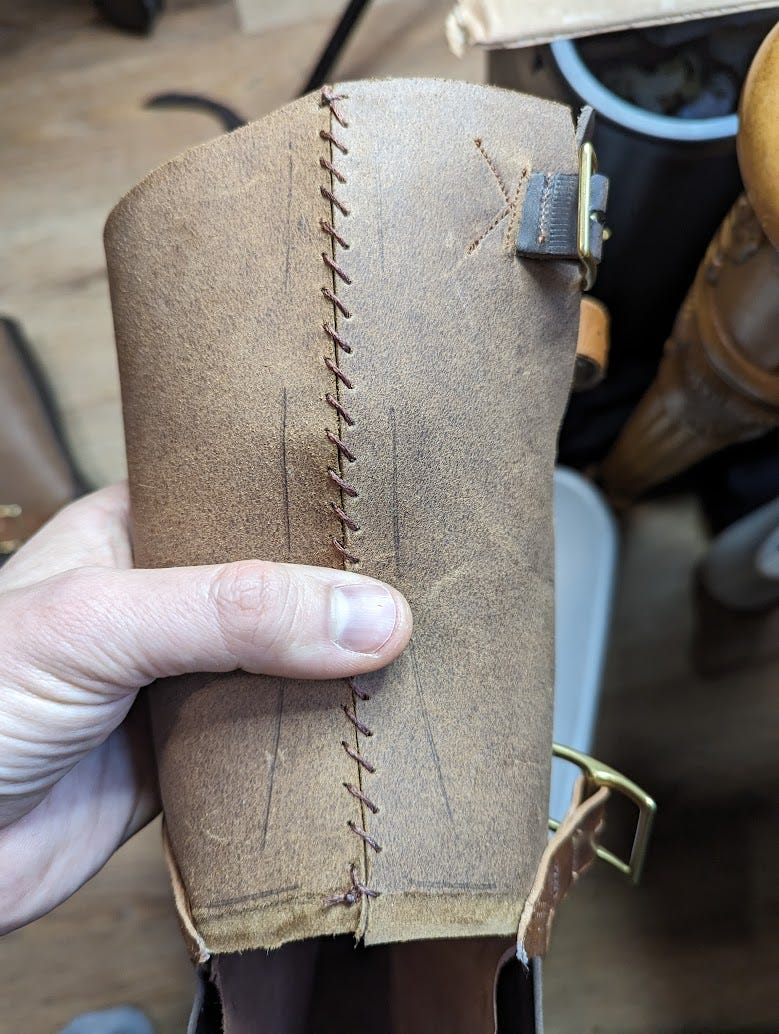
Just tie off the edges, this will all be covered up and stitched over with a heel counter so it isn’t going to go anywhere.
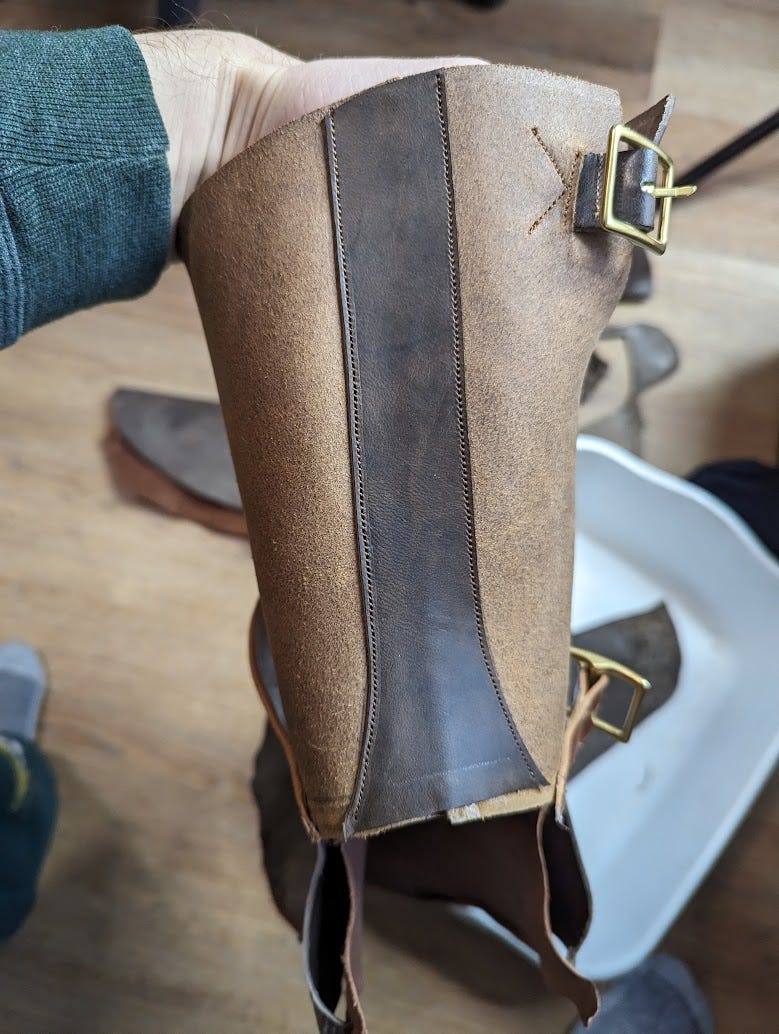
Counter attached and stitched.
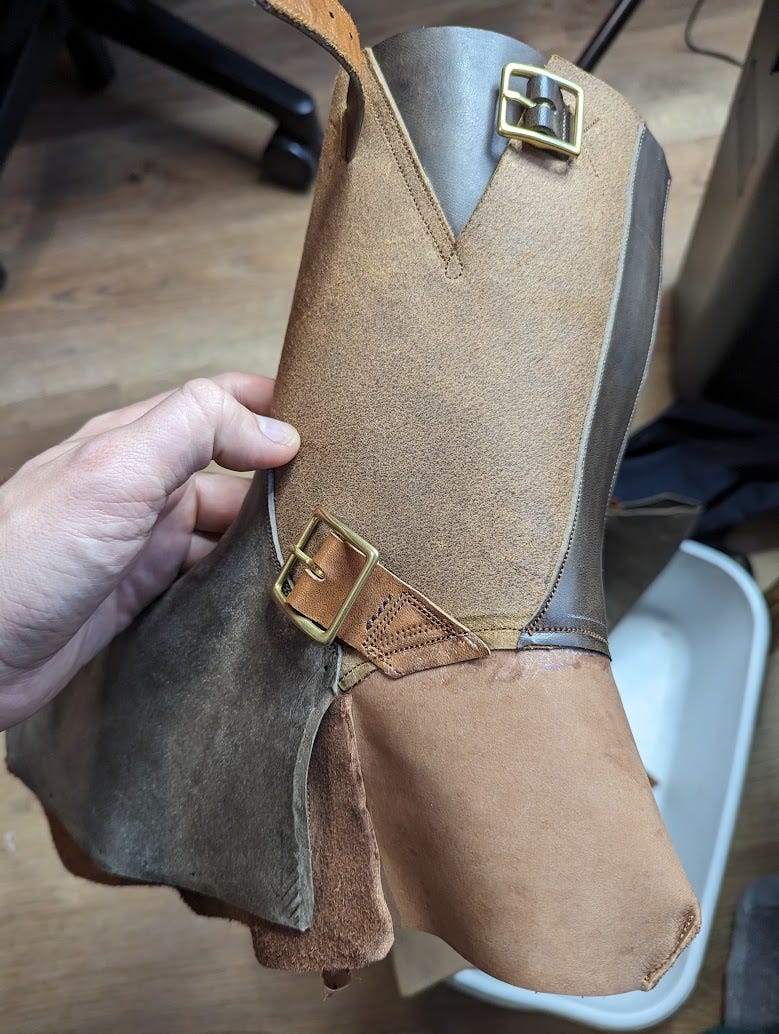
Attaching lining part of the heel, same concept as the vamps where it is sandwiching the lasting allowance on the tops. Make sure you shift it a bit up so that when you stitch in the heel counter it will also secure your lining. I stitched the lining in just in case before I attached my heel counter. After this, attach your counters and stitch everything together. I came back in and trimmed the excess lining (past the stitching), just to make sure it doesn’t come loose.
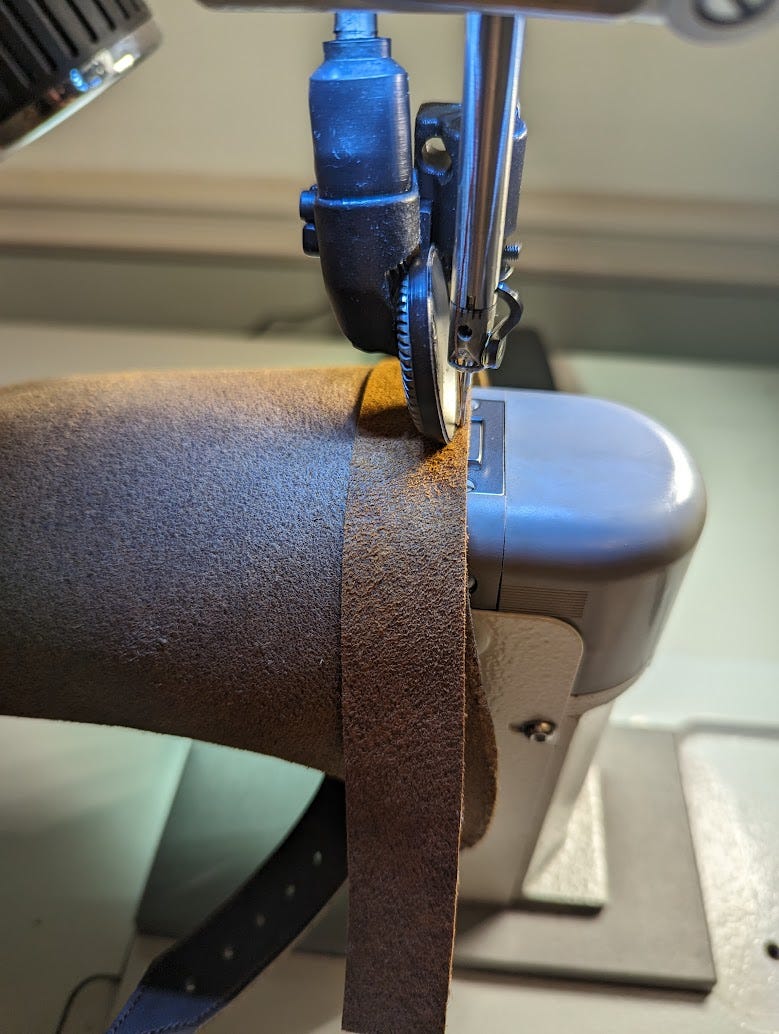
The last step is to add your rolled topline. It just adds a finished look and gives it some strength so it won’t stretch out. Stitch like pictured above first, then fold it over and do a stitch along the top (right where the roll starts), then another one lower to make sure that the rolled over edge doesn’t ever come up on the inside.
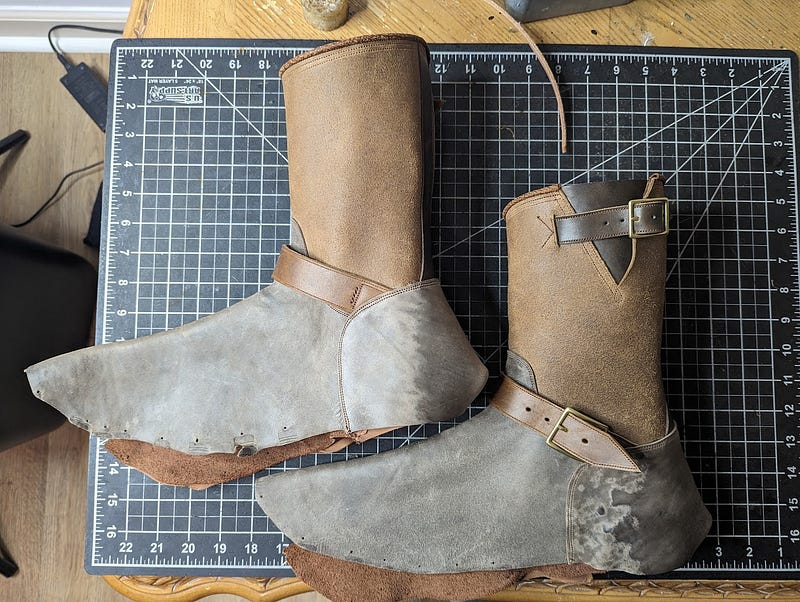
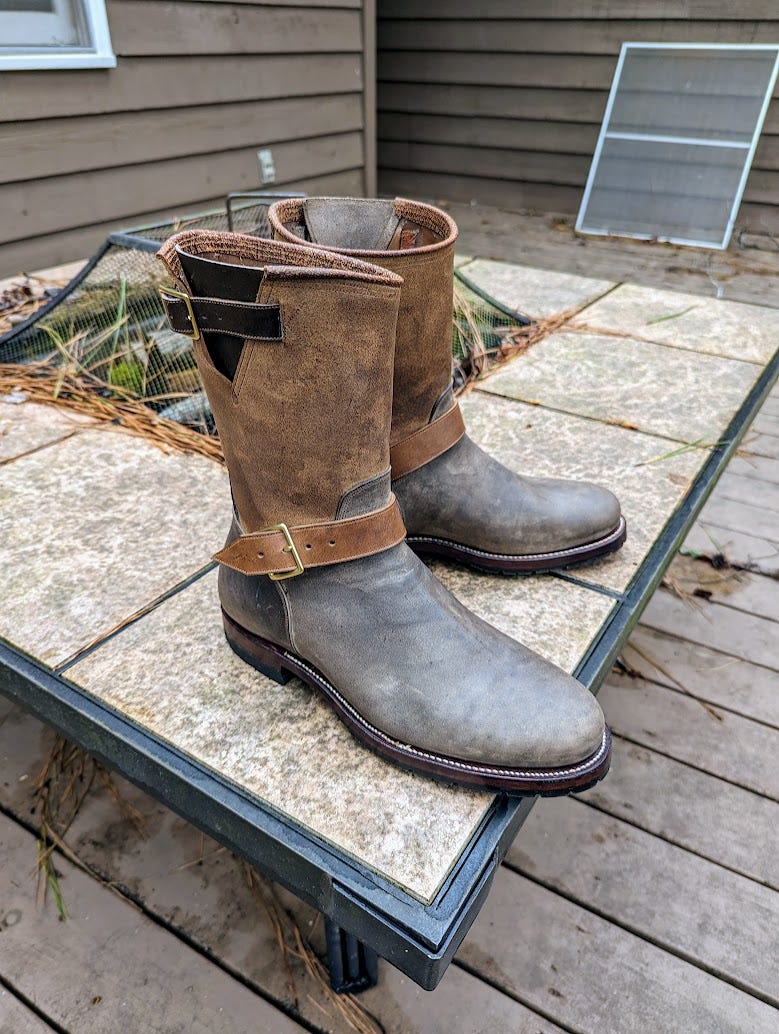
Finished tops! A lot of lessons learned, pretty stressful, but they turned out great!
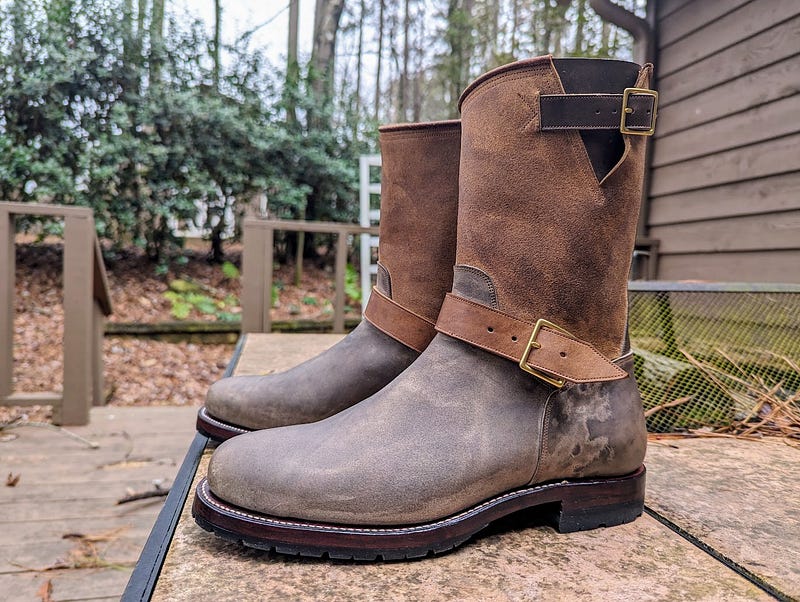
To keep up with my current projects, give my Instagram page a follow


1 comment
Do you sell patterns for size 11 engineers boots?
Thanks